
Screw the suppressor onto the muzzle device or barrel thread, tighten the suppressor securely by hand until tight, and add a ¼ turn with a wrench. When using the Silent Steel USA muzzle device (QD muzzle brake or flash hider), the bottom of the QD adaptor should fully cover the muzzle device. Ensure, by looking from the front and rear, that the suppressor is straight in relation to the barrel. Damage to the suppressor due to misalignment is not covered by the warranty (baffle strike). Do not use crush washers for muzzle device attachment. Crush washers do not always compress evenly, which can cause the suppressor to install at an angle. Use Silent Steel USA shim plates if necessary for indexing the muzzle device.
The suppressor detaches by firmly unscrewing it. If the suppressor does not come off by hand, there is a place for a wrench at the rear of the suppressor. It is advisable to protect the wrench, for example, with tape to prevent scratching the Cerakote surface of the suppressor.
Note: If the muzzle device has a right-handed thread like the suppressor, the muzzle device may come off with the suppressor when removing it. Therefore, we recommend locking the muzzle device to the barrel using a thread locker.
Screw the suppressor onto the muzzle device until the thread is at the bottom and then rotate and tighten the locking nut. Ensure that the suppressor is straight in relation to the barrel, as damage due to misalignment is not covered by the warranty. Do not use crush washers for muzzle device attachment. Crush washers do not always compress evenly, which can cause the suppressor to install at an angle. Use Silent Steel USA shim plates if necessary for indexing the muzzle device.
Hold the suppressor with your other hand so that it doesn't rotate. Loosen the locking nut. Unscrew the suppressor by holding the suppressor body. DO NOT unscrew the suppressor by holding the locking nut.
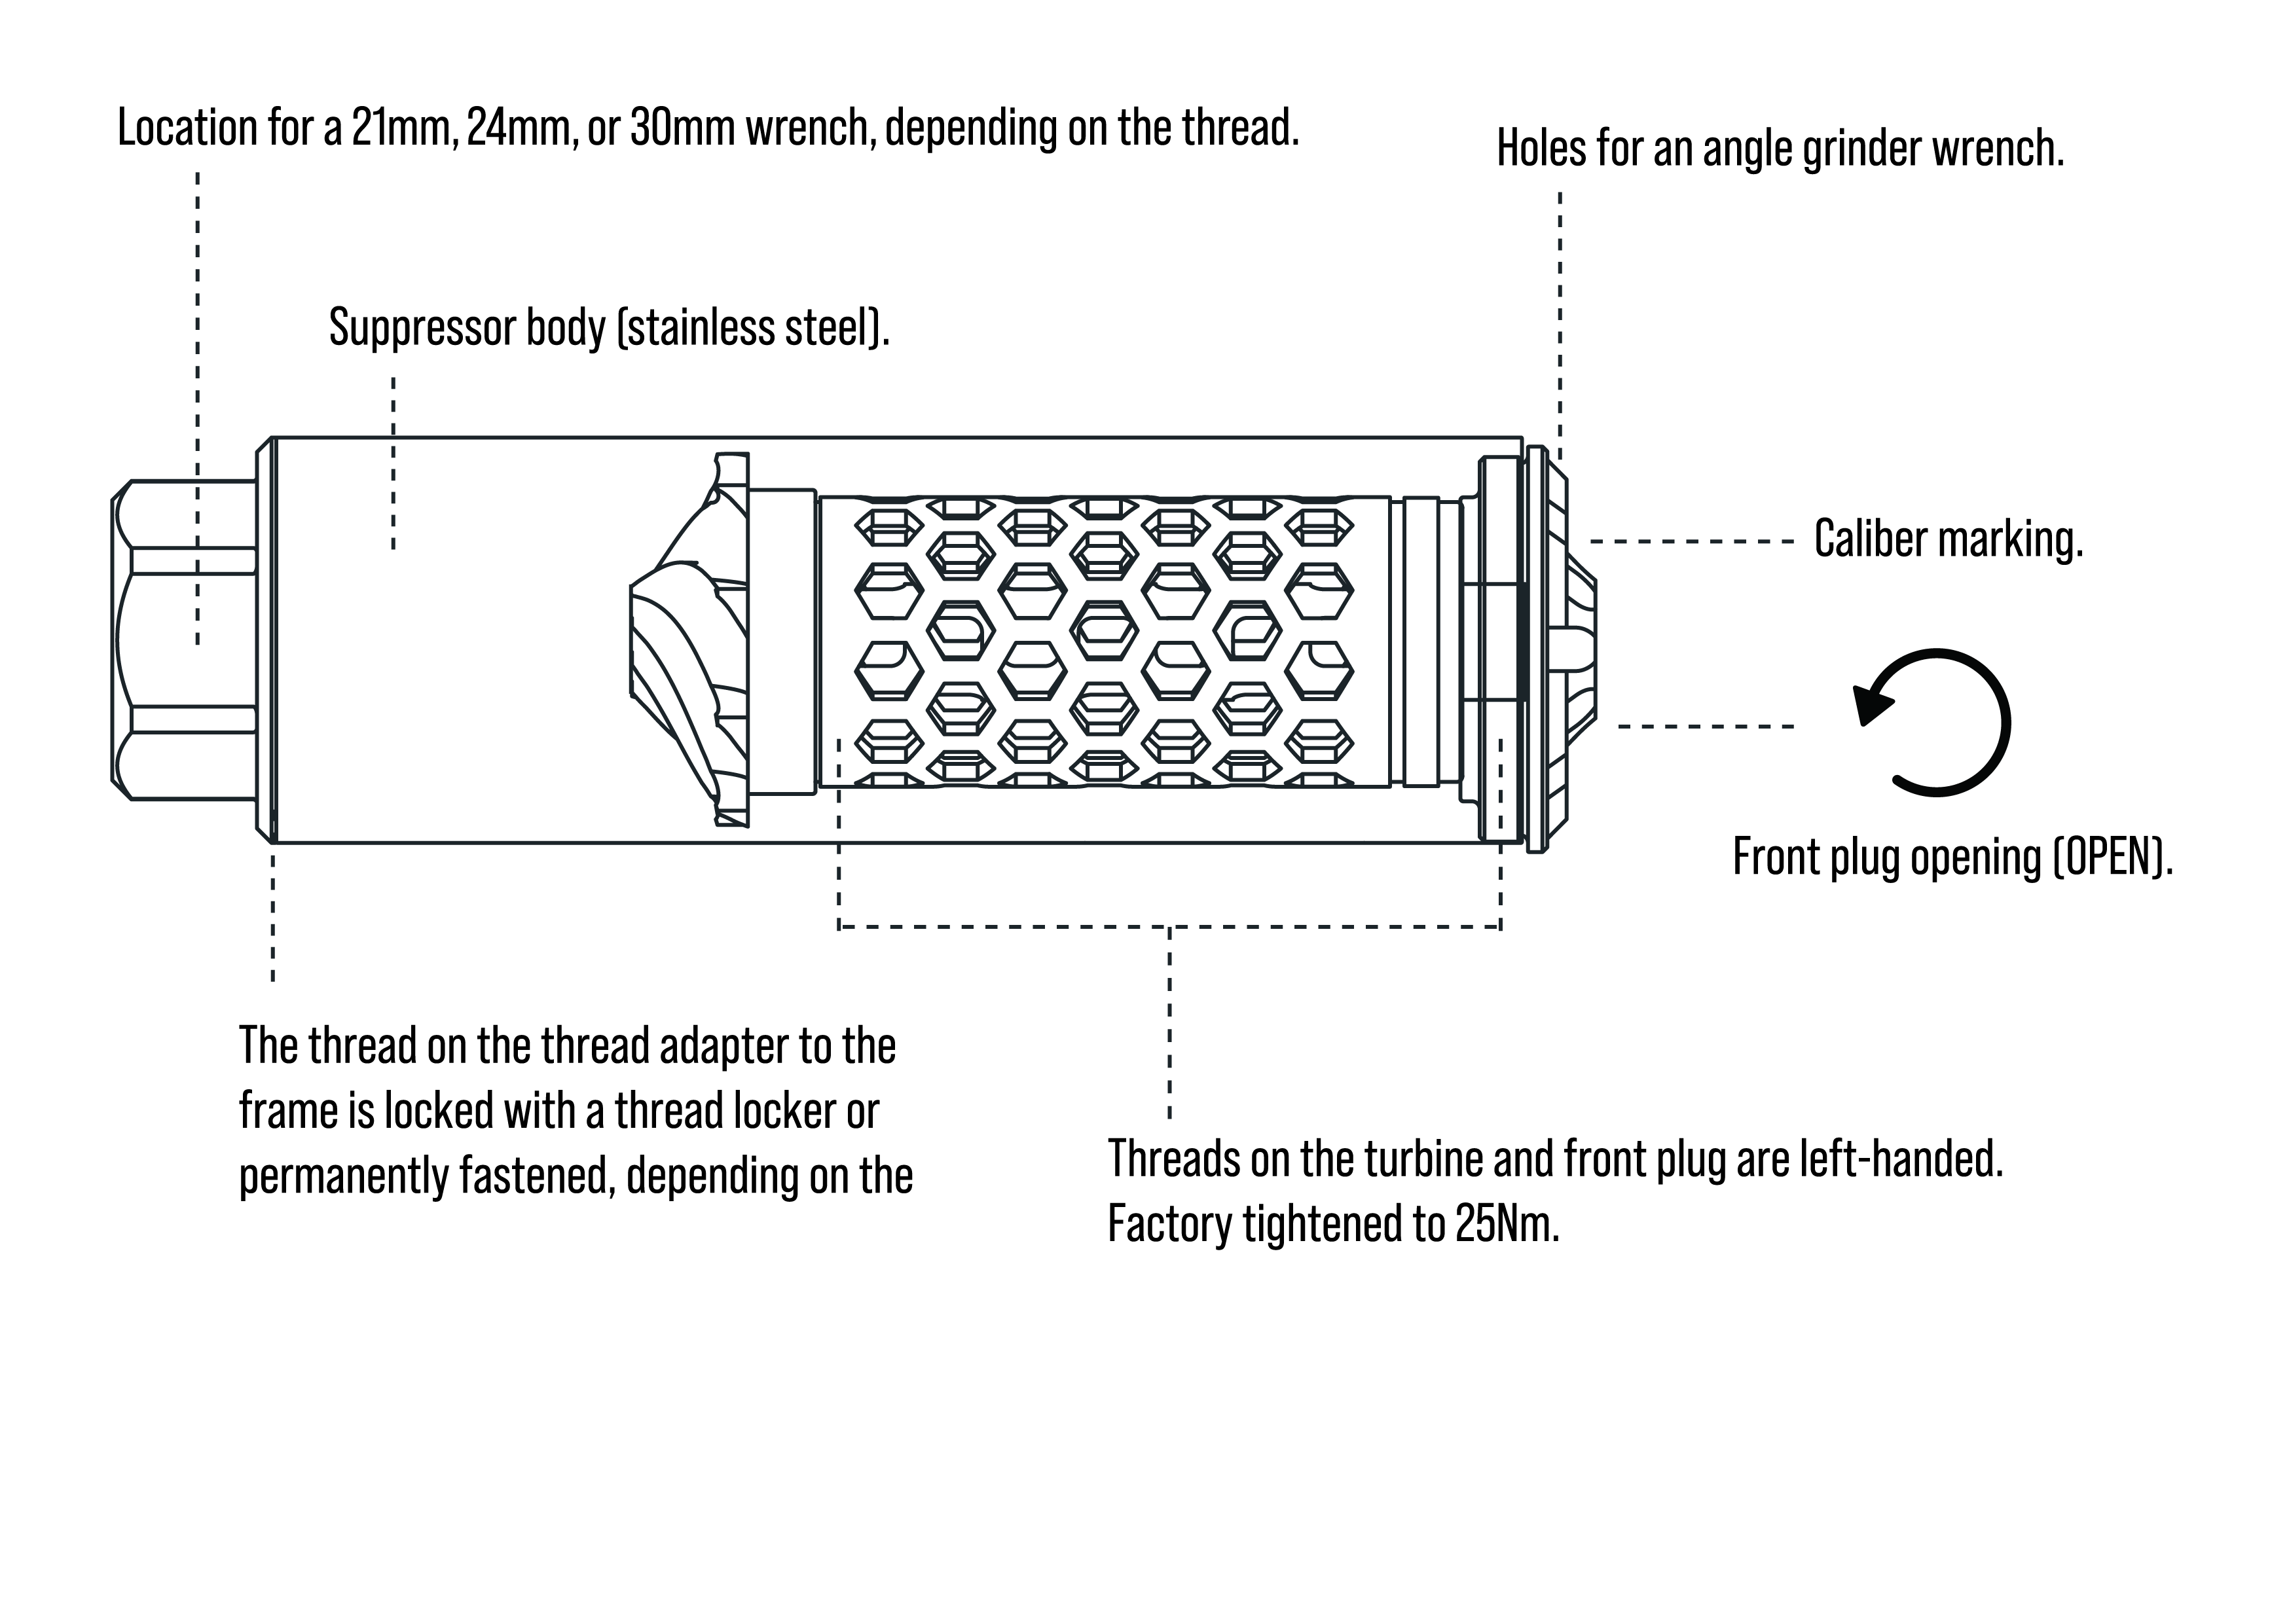
As residue accumulates in the suppressor during firing, its performance can be affected. It is advisable to clean the suppressor regularly. The suppressor can be disassembled from the front using the supplied key. There are slots for the key at the front end. The thread is right-handed. The suppression module comes out as one unit (See Figure 1).
It is recommended the suppression module inside the suppressor be inspected approximately every 1,000 shots. The module can be cleaned, if necessary, using an ultrasonic cleaner or soaking it in chemicals designed for suppressor cleaning and then blowing it clean with compressed air. It is good to clean the interior of the suppressor’s main tube from excess carbon residue with a solvent and a brush. You can test the functionality of the through-flow module by covering the front of the bore with your finger and blowing from the back. Air should pass through the suppressor effortlessly. When reassembling the suppressor, ensure that all threads are secured tightly. It is recommended that the flow unit be suspended inside the ultrasonic tank and ran at a low heat setting if equipped. Suspending the flow unit will allow for better removal of particulates and protect the Cerakote finish on the end cap. **note that repeated ultrasonic cleaning can cause coating to flake off.
